DSP Onboarding Guide
Welcome to Nova Fora. This guide helps you get your delivery service provider (DSP) team ready to manage vehicles and repairs. If you are the DSP Owner, start here. If you have been invited to join an existing team, accept your invitation and go to New DSP Training.
You do not need to learn everything at once. First, set up your business and fleet. Then walk through a vehicle with your team so everyone knows where to find work and who to ask for help.
Choose Your Starting Point
Section titled “Choose Your Starting Point”If you received an invitation, open its email link and use the invited address. If the app offers Create a DSP account, choose your language, enter your email and optional name, consent to the signup email, and select Send signup email. Check your inbox and use the link to verify the address and create the account. The receipt page confirms your request; it does not sign you in or guarantee that a new account was created.
Already have an account? Sign in or reset your password. If you already have an invitation, use that link. If signup is temporarily unavailable or asks you to wait, follow the message rather than repeatedly requesting emails.
The shorter Body Repair setup
Section titled “The shorter Body Repair setup”Some new DSP accounts use a shorter setup: business contact details, Stations, at least one vehicle, the service agreement, and the Terms. Complete the pages shown, including a requested Station review if yours is missing. You do not need to invent team invitations or inspection schedules that this setup does not ask for. After setup, Body Repair opens so you can start a request. Return to your organization settings later to complete daily operating details.
The longer setup below applies when those additional pages are shown. Read the agreements and linked privacy information before accepting them.
Before You Start
Section titled “Before You Start”Have your business address, phone number, time zone, and usual loadout time handy. Loadout is when your vehicles need to be ready for the day’s routes.
You’ll also need your fleet list, the names and email addresses of the people you want to invite, and someone authorized to sign the service agreement. For each vehicle, gather its fleet number, vehicle identification number (VIN), license plate, mileage, and ownership or rental details.
If an inspection is already planned, have its date, vehicle location, and key arrangements ready. Decide who will approve repairs and which shops your team normally uses.
Accept Your Invitation
Section titled “Accept Your Invitation”Open the invitation in your own email inbox and check the business name and your role. Follow the link to create your account, set your password or passkey, and complete any security steps shown. Nova Fora will then take you through setup.
If the invitation has expired, ask for a new one. Use your own account so your team can see who made each update.
Complete The Setup
Section titled “Complete The Setup”Follow the pages shown for your organization. If a page lets you finish something later, make a note of it so it doesn’t get forgotten.
1. Add organization details
Section titled “1. Add organization details”Check your business name, then enter the contact details, address, time zone, and loadout time. Choose Continue when they look right. The time zone matters because your team will use these times to plan inspections and repairs.
2. Select Stations
Section titled “2. Select Stations”A Station is the operating location assigned to your DSP. Search for and select the Station or Stations you actually work from. This is separate from the lot where you park your vehicles.
If yours is missing and you see Request a Station, enter its name and address, then follow the next step on screen. The request still needs review. If you cannot request it, ask your manager or support for help rather than choosing a different Station.
3. Invite your team
Section titled “3. Invite your team”Enter each person’s name and email address, then choose the role that fits their work:
| Role | Who it is for |
|---|---|
| DSP Manager | Someone who manages daily fleet work. |
| DSP Dispatcher | Someone who inspects vehicles and coordinates repairs. |
| DSP Viewer | Someone who needs to read information without changing it. |
Check the spelling of each email address before sending the invitations. Your teammates will use those invitations to set up their own accounts.
4. Add your fleet
Section titled “4. Add your fleet”You can add vehicles one at a time or import a fleet file.
If your rental company is not in the list, select Other in the rental/FMC company field. You can use this category during import or when you edit a vehicle. Fleet files with Other as the provider use this category automatically. Other does not appear in FMC Relationships and does not establish a relationship with a repair shop.
For a single vehicle, enter its fleet number, VIN, plate, and mileage. Review the details and any warnings, then choose Add vehicle. For a file, choose the import option, upload the file, and review the results. Review the created, updated, and skipped counts, and correct any rows that need attention before moving on. If only part of a file was applied, check the saved fleet before retrying; do not assume that the whole import failed.
Take a moment to check vehicle numbers and plates carefully. These are how your team will recognize the right van when reporting a problem or arranging a repair.
5. Confirm inspection readiness
Section titled “5. Confirm inspection readiness”Check the inspection date if one is shown. Add the location and explain how the inspector will get the keys. When the vehicles and required information will be ready, choose Confirm inspection readiness.
6. Confirm repair routing
Section titled “6. Confirm repair routing”Review how your team will choose a shop for each type of repair, then choose Confirm routing. If you’re unsure which shop to use, settle that with the person who manages your repairs before confirming.
7. Choose alerts
Section titled “7. Choose alerts”Choose which updates you want and how you’d like to receive them. If you want text messages, verify your phone and select the SMS topics you need; verifying the number alone does not choose them for you. See notification settings for help.
8. Sign the agreement
Section titled “8. Sign the agreement”The person authorized to sign for your business should read the agreement, select the confirmation box, enter their name, and choose Sign agreement. Wait for the confirmation before continuing.
9. Accept the Terms of Service
Section titled “9. Accept the Terms of Service”Read the Terms, select the confirmation box, and choose Accept and finish. Your DSP workspace will open.
Set Up Daily Operations
Section titled “Set Up Daily Operations”After setup, open Admin and your organization settings. Check the loadout time, vehicle locations, contact details, and key return instructions. Review your notification choices and shop relationships for each repair type, then save your changes.
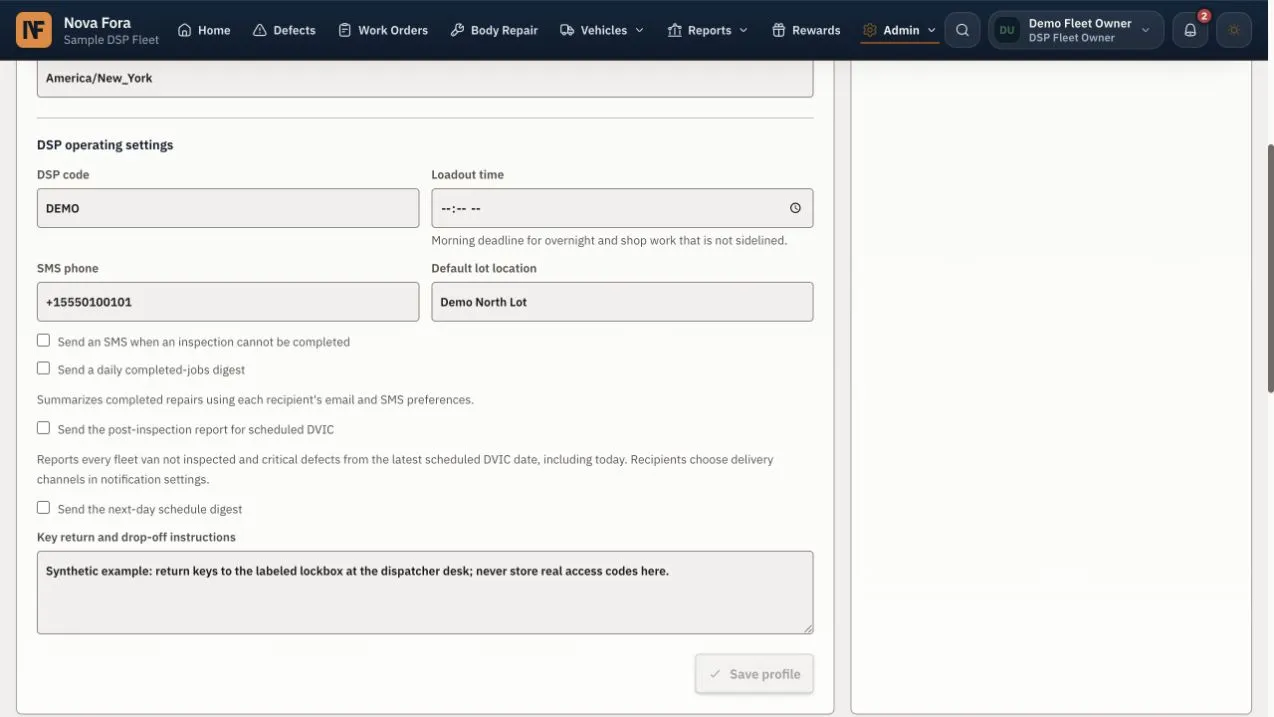
This example shows the settings page available after setup, not the invitation steps. Your menu may look different.
Write instructions a new driver can follow, such as “Park in the north lot and return the keys to the dispatcher.” Keep door codes, alarm details, and other access secrets out of these notes. Tell your team whenever you change an instruction they rely on.
Train Your Team
Section titled “Train Your Team”Make Body Repair for DSPs part of your first training session. Decide who will approve quotes and added work, arrange inspection links and keys, review finished reports, and handle payment.
Next, open New DSP Training with your manager. It walks through reporting a problem, sending work to a shop, reviewing a repair, and receiving a vehicle back.
Before the first shift, make sure everyone can sign in, find the right vehicle, and name the person who approves repairs. Check that the fleet list and key arrangements are correct and that your agreements are complete. You can revisit anything else together as it comes up.
Check Your Launch
Section titled “Check Your Launch”Walk through one vehicle with a teammate. Find it in the fleet list, check its details, and locate the inspection action. Confirm who will review any problems and which shop you would contact. There’s no need to submit a test repair on a real vehicle.
If You Need Help
Section titled “If You Need Help”If a setup page won’t continue, look for a missing field or a message beside it. If a vehicle won’t save, recheck its fleet number, plate, and VIN. For an import, work through the rows marked for review.
If an agreement still won’t open after retrying, or you cannot get past a step, ask support for help and include the message shown on the page. For day-to-day work after setup, see the DSP Guide.
Connect Slack if Your Team Uses Roger
Section titled “Connect Slack if Your Team Uses Roger”Roger lets drivers report vehicle problems from Slack. After setup, the DSP Owner can connect the workspace and choose the reporting and manager channels. Follow Roger and Slack, then show your team where to report a problem.