Vendor User Manual
Use this manual if you work for a repair shop. It covers new work from receipt through repair, evidence, payment status, and vehicle return.
New to Nova Fora?
Section titled “New to Nova Fora?”Start with New Vendor Training. It walks through your first shift with examples and screenshots. Then use the detailed instructions below whenever you need help with a particular task.
Contents
Section titled “Contents”- Set up a vendor organization
- Vendor Admin and Service Writer tasks
- Foreman and Technician tasks
- Vendor Viewer tasks
- Manage mechanical repairs
- Check vehicles in and out
- Manage body repairs
- Use vendor notifications
- Use vendor reports
- Manage settings and payments
- Solve common problems
Start Your Day
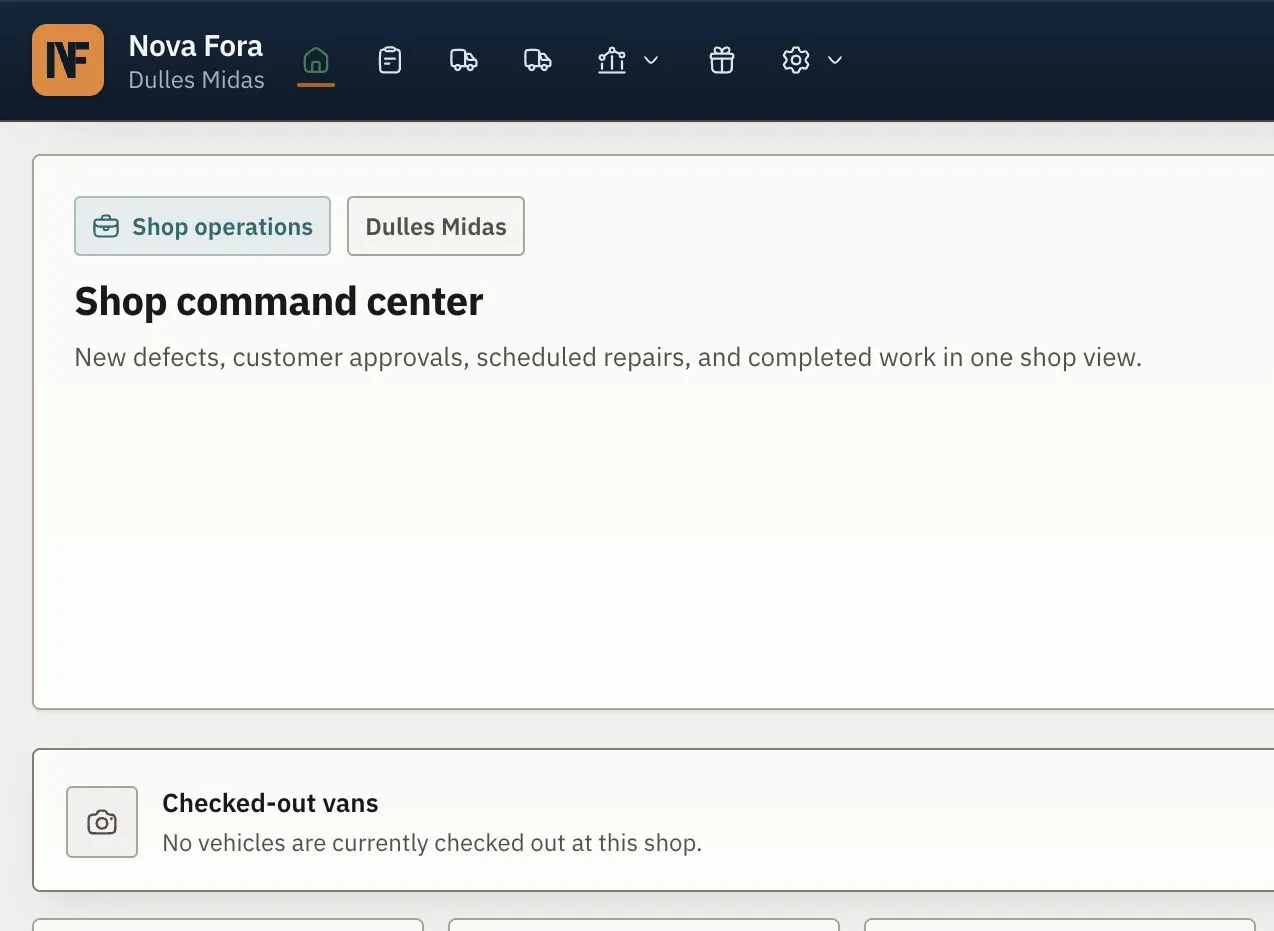
Section titled “Start Your Day”Open Home and select the correct workshop. Review incoming requests, assigned work, pickups, scheduled visits, inspections, work in the shop, and alerts. Select a measure to open the related list.
Receive Mechanical Work
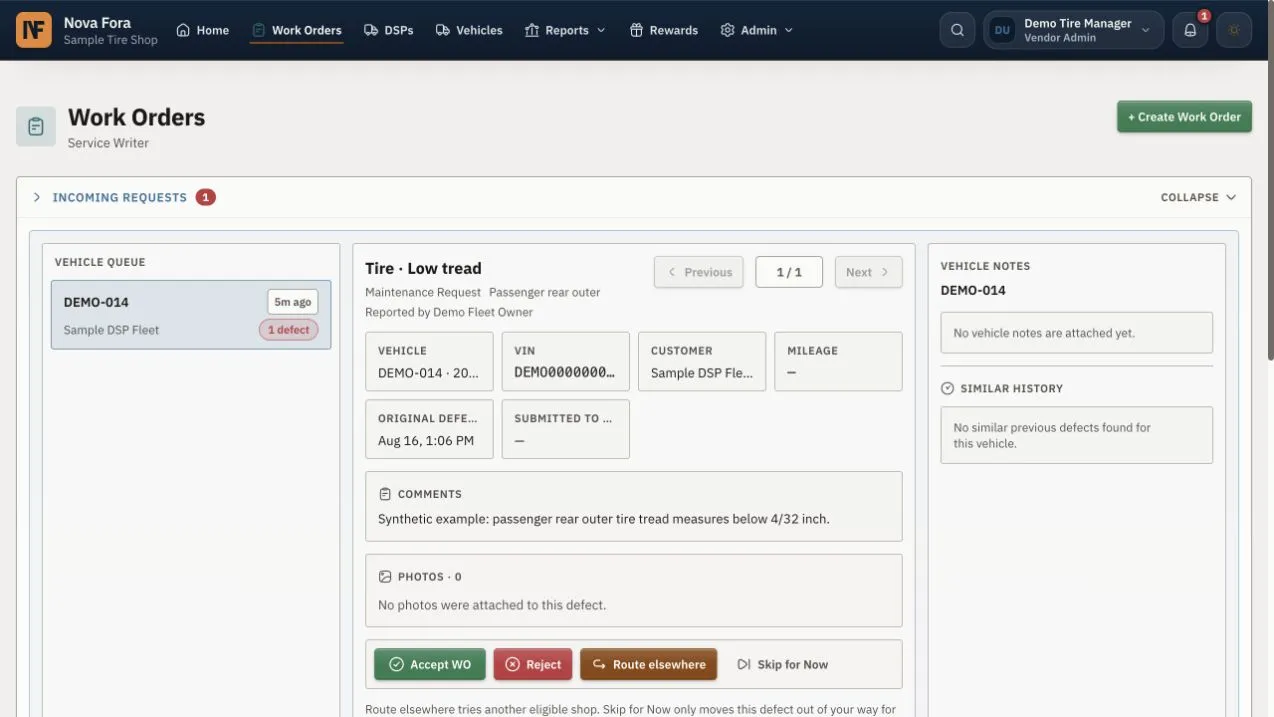
Section titled “Receive Mechanical Work”Open Work Orders and review each incoming request. Confirm the vehicle, customer, reported problem, photos, requested timing, and repair history. Accept work only when your shop can complete it. Route, reject, or defer it when the available action matches the situation.
Plan Active Work
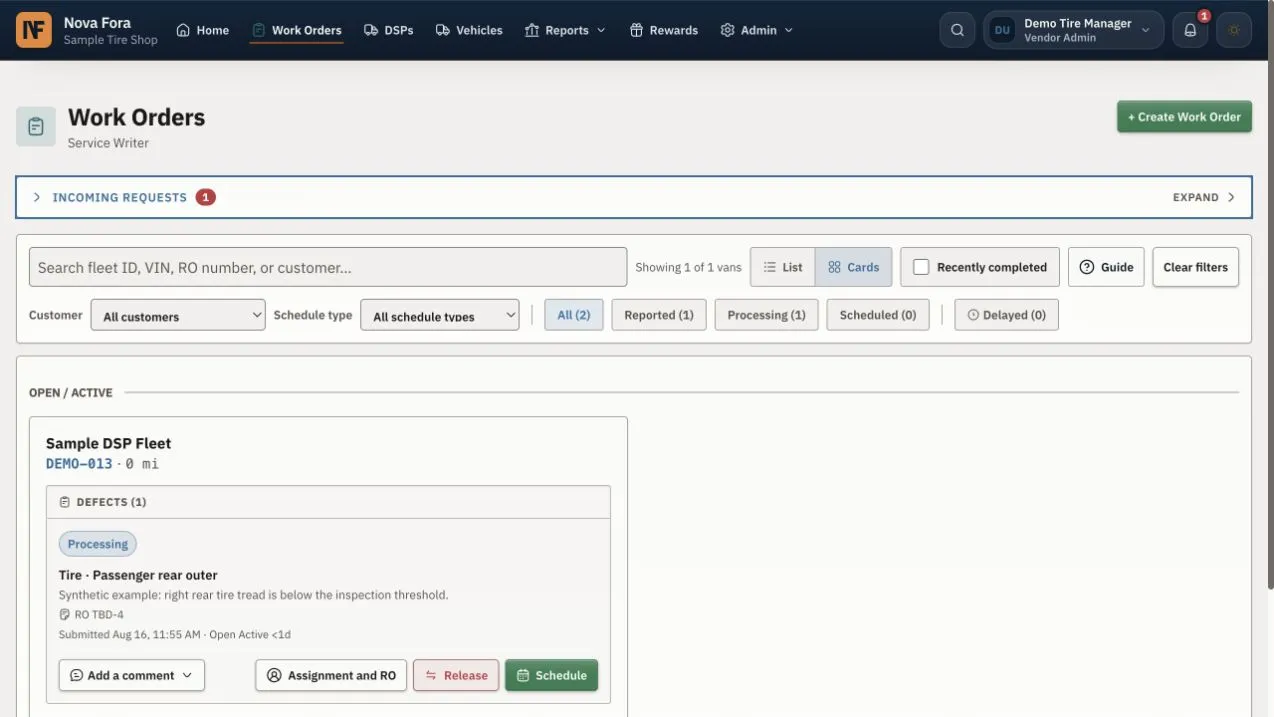
Section titled “Plan Active Work”After acceptance, add the shop repair-order number when your shop uses one. Assign the correct team or technician. Schedule the visit only after you confirm the vehicle, staff, parts, tools, and space. Reopen the record to check that the assignment and time were saved.
Record Mechanical Pickup
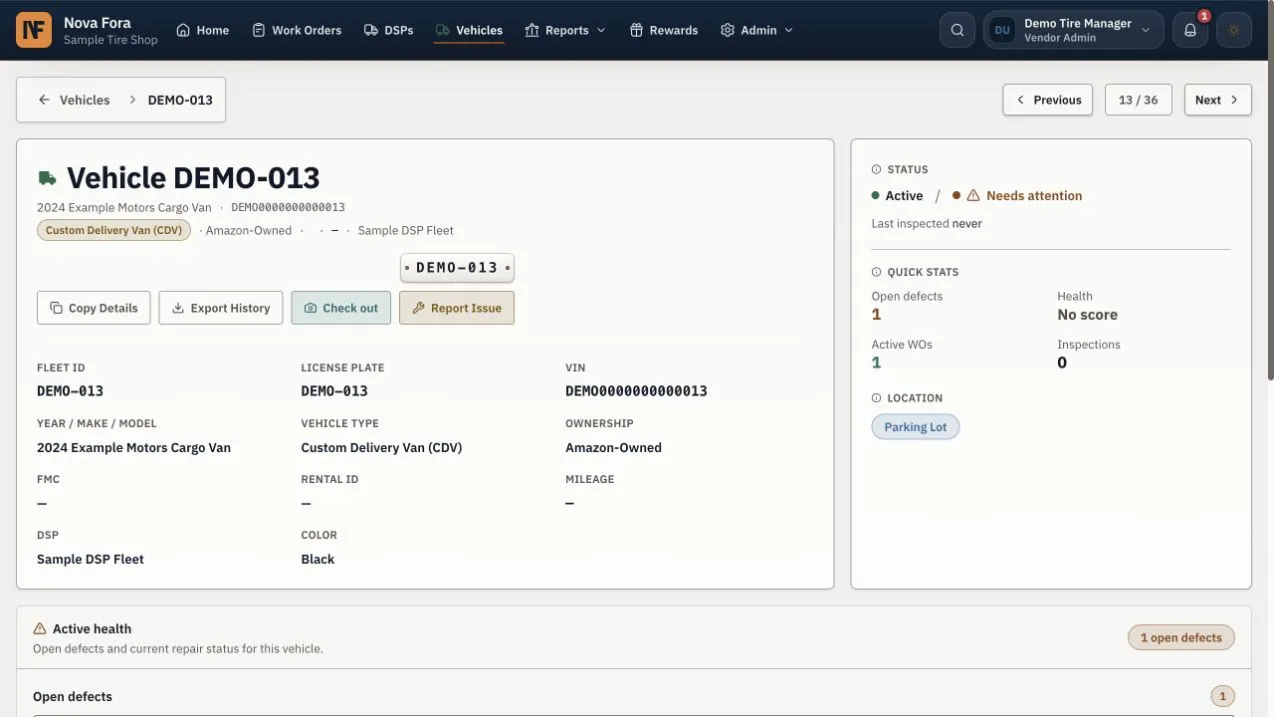
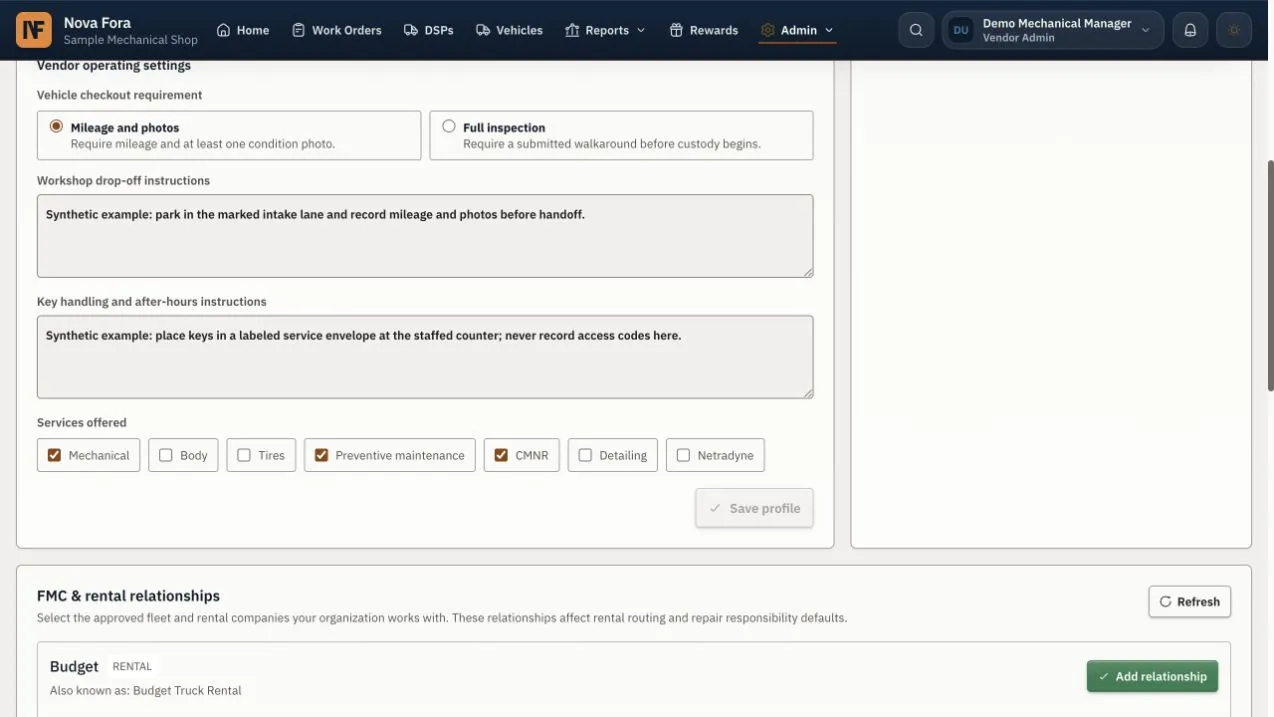
Section titled “Record Mechanical Pickup”Before your shop takes custody, match the fleet number, plate, and vehicle description with the vehicle in front of you. Record the required mileage. Take the required odometer and condition photos. Confirm the key handoff and location. Check Out means the vendor takes custody; Check In means return to the DSP. Confirm the physical action, submit once, and verify the custody record. Read custody instructions before your first handoff.
If the mileage is lower than the earlier record, a required photo is missing, or the vehicle does not match, stop and correct the record. Do not start work on an uncertain vehicle.
Complete Mechanical Work
Section titled “Complete Mechanical Work”Open the assigned Work Order. Read the approved scope and customer notes. Record diagnosis, work performed, parts, photos, measurements, and work that could not be completed. Ask for approval before added work. Complete the repair only when required evidence is present and every item has a clear result.
Manage Body Repair
Section titled “Manage Body Repair”Open Body Repair and use the stage groups to find requests that need a quote, pickup, repair action, finished report, or return. A request can show In Repair to the shop while the DSP sees In Shop.
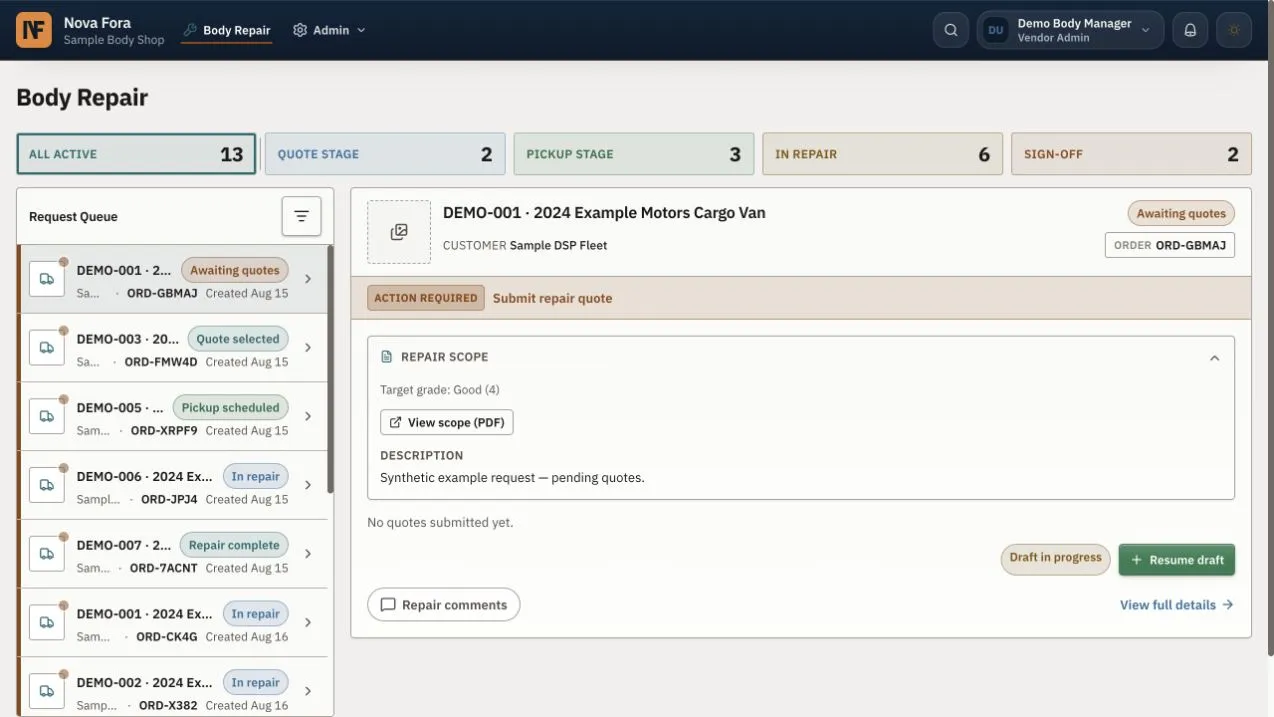
Before quoting, read the current scope, all photos, the inspection report, repair quality, location, and requested timing. Ask the customer a clear question in Repair Comments if anything is uncertain. Each bidding shop has a private conversation with the customer.
Create one quote line for each repair operation. Include parts, quantities, body labor, paint labor and materials, fees, tax, and a realistic duration. Save a private draft when it is not ready. Submit only after you compare every line with the current scope.
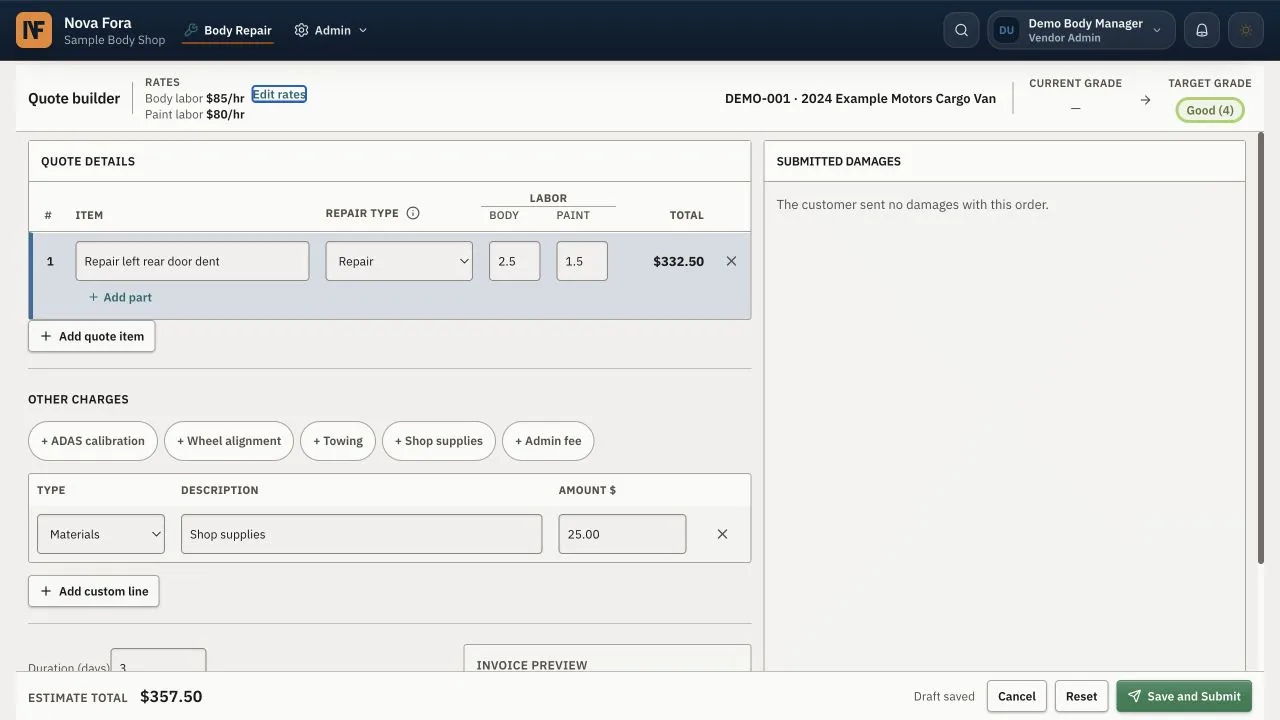
After selection, propose pickup. At pickup, record odometer mileage and at least one clear odometer photo. Complete the required before-repair inspection. During repair, add useful progress notes and submit a quote adjustment or supplement before unapproved added work.
Complete the after-repair inspection and the finished report. Give every repair item a Fixed result with evidence or a Could not fix reason. Send the report for DSP review. If the DSP rejects it, read the reason, correct the work or evidence, and send it again.
Wait until the repair shows that return is allowed. Record final mileage and the required return photos. Confirm the recipient, keys, location, and handoff time. Submit once and verify that custody ends.
Read Notifications
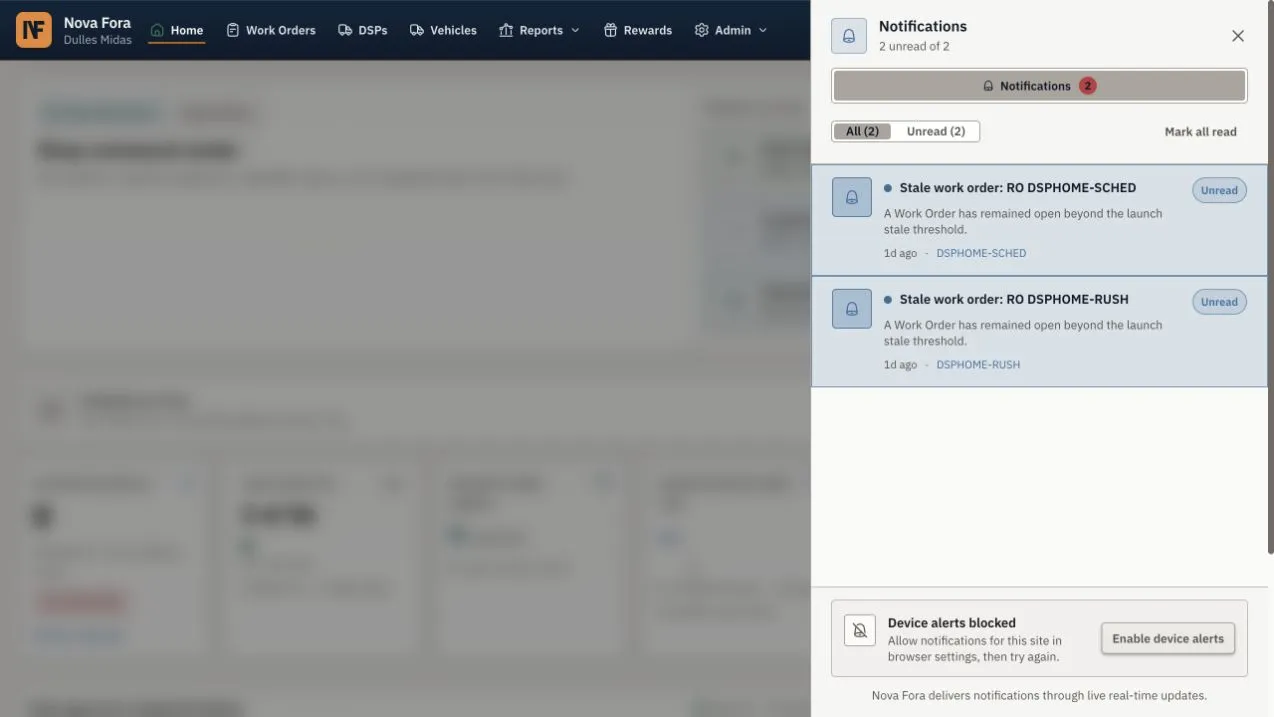
Section titled “Read Notifications”Select the bell to review new work, schedule changes, customer comments, approvals, payment states, and overdue actions. Open the related record before you act. Mark a message read after you review it. Resolve it only after the related work is finished.
Use Vendor Reports
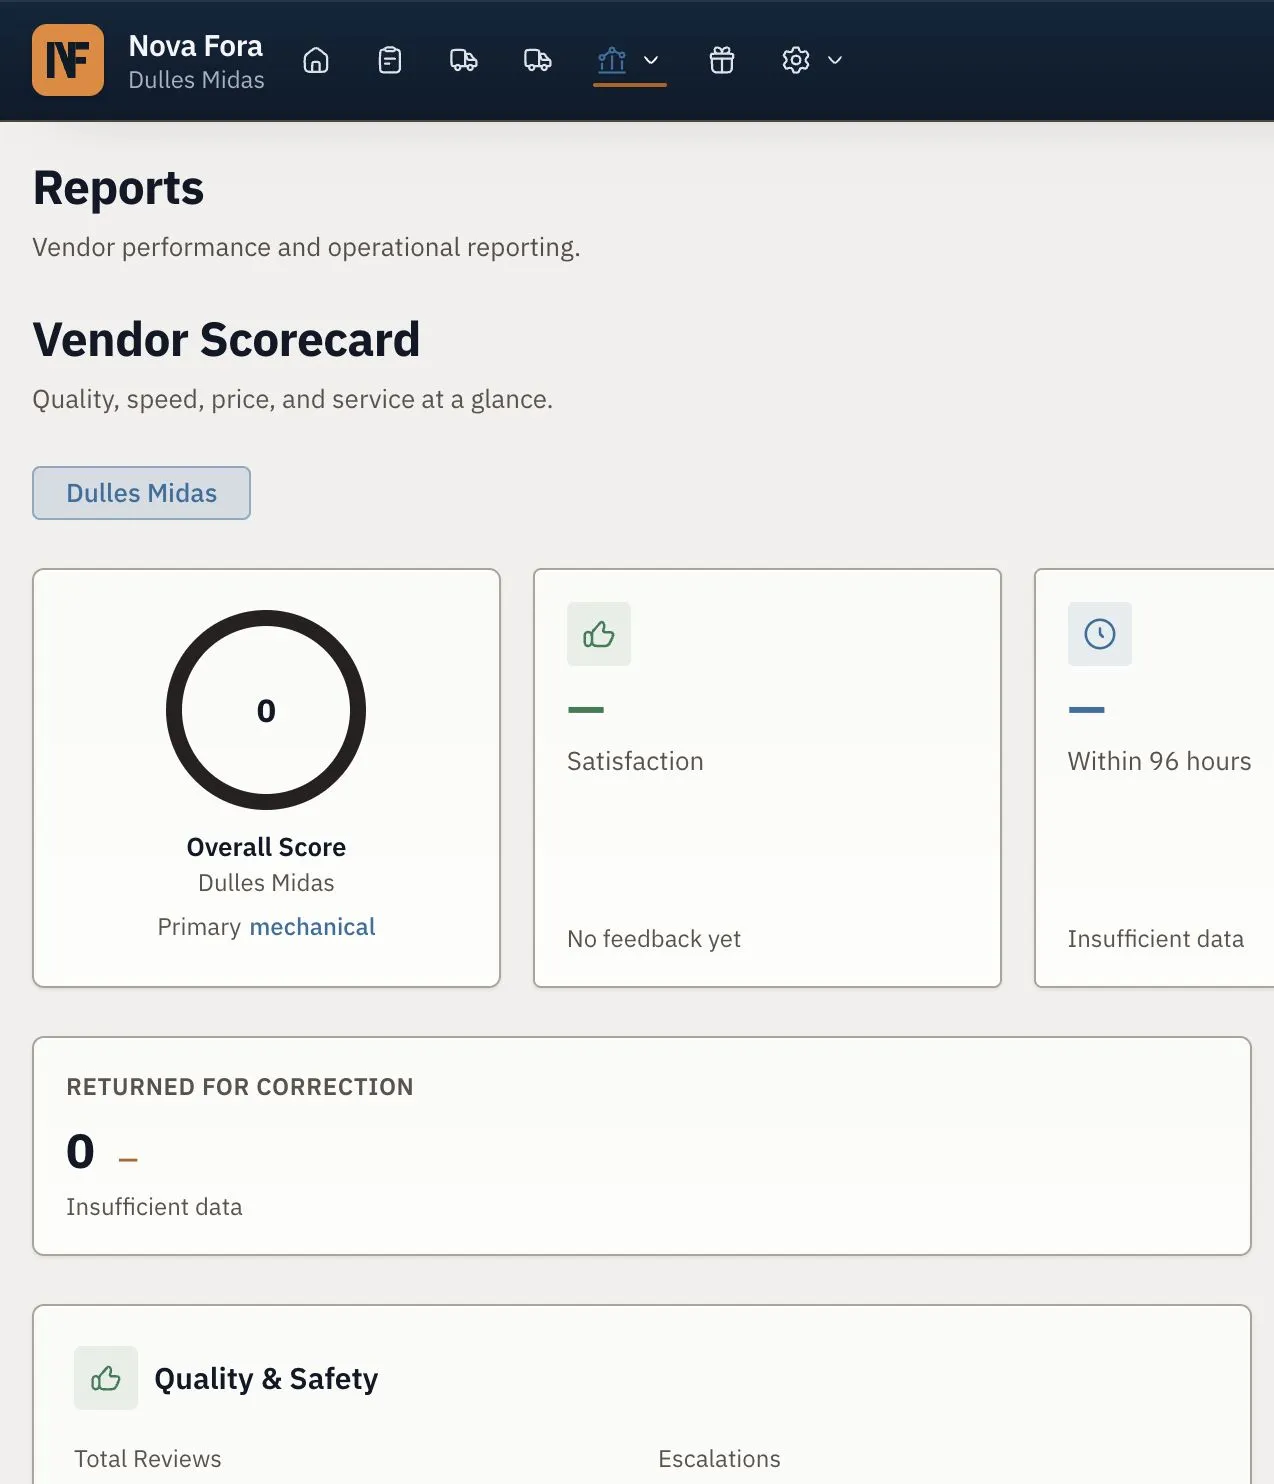
Section titled “Use Vendor Reports”Open Reports to review operational search, repair performance, vendor scorecard, technician shifts, and Shop Execution when available. Select the workshop and date range first. Use filters to narrow the list. Open supporting work before you discuss performance or correct a record.
Configure the Shop
Section titled “Configure the Shop”Vendor Admins maintain services, workshops, teams, staff access, handoff instructions, checkout evidence, hours, targets, and payout readiness. Remove a service your shop cannot perform. Keep passwords, bank details, door codes, and customer-sensitive data out of notes.
Finish Your Day
Section titled “Finish Your Day”Record unaccepted rush work, vehicles expected for pickup, vehicles in your custody, incomplete inspections, repairs waiting for approval, payment holds, and promised returns. Give each item a named owner and a due time.
Roger and Slack
Section titled “Roger and Slack”See Roger and Slack to learn how DSP drivers report problems, how owners connect Slack, and how the team follows up in Nova Fora.